
Colour Application
How to get the very best results with Naturtint
If you are colouring your hair for the very first time or just looking to achieve the very best colour application, read on for a step-by-step guide and expert tips and advice!
Don’t forget, before every single application ensure you carry out your skin sensitivity test for 48 hours to check you haven’t developed any sensitivities. If you are trying a new colour, why not carry out a Colour Strand Test too, to determine how the colour develops on your own, unique hair colour and condition.
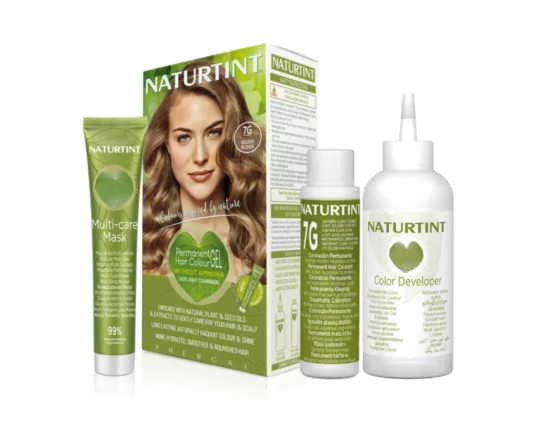
So, what’s in a box of Naturtint Permanent Hair Colour? (For Reflex Semi-Permanent Henna Cream Colours, see below, or for our Naturtint Root Retouch Creme range, click here)
Naturtint Colourant (60ml)
Naturtint Colour Developer (60ml, in applicator bottle)
Naturtint Multi-Care Mask (50ml)
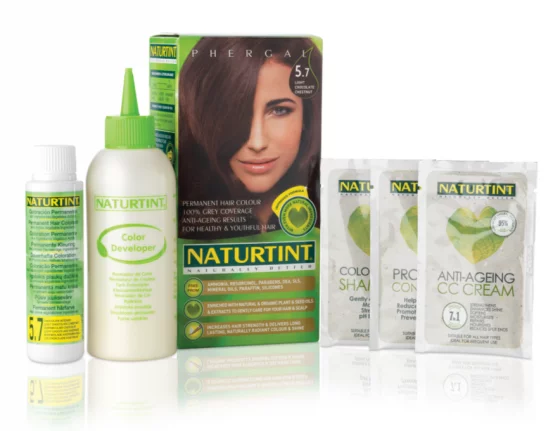
Pre-2020 Permanent Hair Colours
Naturtint Colourant (60ml)
Naturtint Colour Developer (60ml, in applicator bottle)
Naturtint Colour Fixing Shampoo Sachet (15ml)
Naturtint Protective Conditioner Sachet (15ml)
Naturtint Anti-Ageing CC Cream Sachet (15ml)
Plus:
Protective gloves – to be worn at all times during the colouring process. In newer packs, you will find the gloves attached to the instruction leaflet.
Instruction Leaflet – please read completely at least once before use, and follow carefully.
What else might you need?
An old towel or protective cape to cover your shoulders and prevent staining on your clothes – you may also want a hair grip to keep it in place. Some people also like to use a tail comb to part the hair or an application brush to apply and you will need a pair of scissor to remove the top of the applicator nozzle. Don’t forget a watch or timer to keep an eye on your development time!
NATURTINT PERMANENT APPLICATION – OPTION 1, Full head application.
Recommended if you are colouring your hair for the first time, you have significant regrowth, or you are dramatically changing your colour.
STEP 1: PREPARE & MIX UP YOUR COLOUR
Ensure your hair is dry and clean, as a build-up of styling products can affect your colour result. We recommend colouring your hair the day after washing, to allow some of the scalps natural oils to be produced as this will further help protect your scalp during colouring.
Comb your hair before application, always wear the gloves provided and ensure you have all the utensils you may need to hand before starting.
1. Protect your shoulders with a towel to prevent accidental staining of your clothes. You may also wish to protect the immediate surrounding area, especially any carpets or fabric, as permanent staining may occur if colour mixture is accidentally spilt.
2. Put on the gloves provided and keep them on during the whole colouring process.
3. Unscrew the caps of both the Colourant and the Colour Developer. Pour the total contents of the Colourant bottle into the Developer bottle and replace the cap on the Developer bottle.
4. Shake the Developer/Applicator Bottle well for 2 minutes until the mixture is totally blended.
5. Cut the top part of the nozzle off immediately, ready for application.
STEP 2: APPLY YOUR COLOUR
1. Using gloved hands, first apply the mixture to your roots, using the tip of the Developer/Applicator Bottle to part your hair into small sections.
2. Immediately massage the remaining mixture through the rest of your hair, to ensure the colourant is evenly spread.
3. Leave to develop for 30 minutes. To achieve a more intense colour, or to cover stubborn grey, increase the development time to a maximum of 40 minutes.
STEP 3: RINSE & PERFECT
1. RINSE: Once you have reached your desired development time, using gloved hands, gently massage your hair whilst thoroughly rinsing it with warm water until the water runs completely clear, making sure that no hair colour gel remains in the hair. If colour residue persists, you can also wash your hair with a natural pH shampoo, such as the Naturtint Colour Fixing Shampoo and rinse again with plenty of water.
NOTE! If you have a ‘pre-2020’ permanent hair colour pack, a sachet of the Colour Fixing Shampoo is included in your pack, along with a sachet of Protective Conditioner and Anti-Ageing CC Cream, to be used in the place of the Multi-Care Mask. Please refer to pack for specific instructions for use.
2. Apply a small amount of the Multi-Care Mask to your hair whilst still wet, working from the roots to the tips to ensure all of your hair is covered. Leave on the hair for 3 to 5 minutes, then rinse thoroughly with plenty of water. Dry and style as normal. The Multi-Care Mask contains 50ml of product so you can repeat this step in subsequent weeks to prolong the vibrancy and intensity of your colour for longer.
TOP TIP! If you are only colouring a small amount of hair (for example if you only have short hair or you are just touching up your roots) you can mix a smaller amount of colourant and developer in a plastic bowl and apply using a brush. The ratio should always be 1:1. You can keep any UNMIXED product for your next application but DO NOT save anything that has been mixed up. Always store any unused Colourant and Developer in their original containers with the caps tightly secured.
NATURTINT ROOT RETOUCH CREME – 4 Shades suitable for extending the life of a range of Naturtint Permanent shades
Naturtint’s four Root Retouch Crème’s can be used to colour the visible root regrowth in between Naturtint Permanent applications. To view the colours available and the Naturtint shades they are compatible with, click here or read on for a handy ‘How To’ guide!
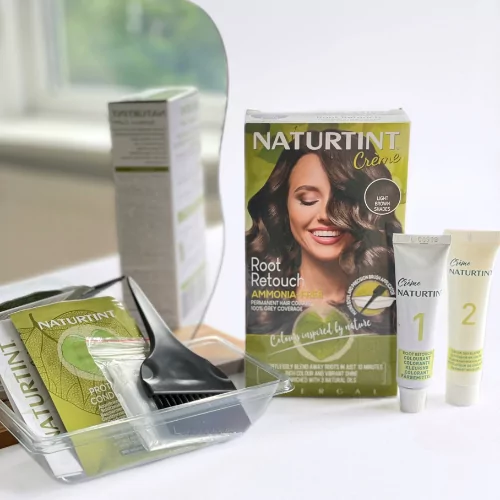
What’s in a box of Naturtint Root Retouch Creme?
Naturtint Root Retouch Colourant (15ml)
Naturtint Colour Developer (15ml)
Naturtint Protective Conditioner Sachet (15ml)
Mixing Bowl
Applicator Brush
Plus:
Protective gloves – to be worn at all times during the colouring process
Instruction Leaflet – please read completely at least once before use, and follow carefully.
What else might you need?
Shampoo to rinse the colour from the hair at the end of development, plus an old towel or protective cape to cover your shoulders and prevent staining on your clothes – you may also want a hair grip to keep it in place. Don’t forget a watch or timer to keep an eye on your development time!
NATURTINT ROOT RETOUCH CREME APPLICATION
First things first, always do your Skin Sensitivity Test for 48 hours before use, even if you have used the Root Retouch product before. Then, if the sensitivity test showed no signs of reaction during or after the 48 hours, you can proceed with colouring;
STEP 1: PREPARE & MIX UP YOUR COLOUR
Ensure your hair is dry and clean, as a build-up of styling products can affect your colour result. We recommend colouring your roots the day after washing, to allow some of the scalps natural oils to be produced as this will further help protect your scalp during colouring. Comb your hair before application, leaving the roots visible: top section, crown and temples, depending on the hairstyle. Always wear the gloves provided and ensure you have all the utensils you may need to hand before starting.
- Protect your shoulders with a towel to prevent accidental staining of your clothes. You may also wish to protect the immediate surrounding area, especially any carpets or fabric, as permanent staining may occur if colour mixture is accidently spilt.
- Put on the gloves provided and keep them on during the whole colouring process.
- Unscrew the caps of both the Colourant (1) and Developer (2) and pour or squeeze out the total contents into the mixing bowl. Mix using the applicator brush for 2 minutes until totally blended.
STEP 2: APPLY YOUR COLOUR
- With gloved hands, apply the mixture to your roots using the applicator brush, ensuring they are completely covered. Do not massage the product through the rest of the hair.
- Leave the mixture to develop for 10 minutes (20 minutes if you have stubborn grey).
STEP 3: RINSE & CONDITION
- Once you have reached your desired development time, using gloved hands, gently massage your hair whilst thoroughly rinsing it with warm water until the water runs completely clear.
- Cleanse your hair with your regular shampoo to ensure all hair colour is removed, then gently squeeze excess moisture from your hair.
- Then apply NATURTINT® Protective Conditioner to help detangle your hair, add strength and boost shine. Gently massage through from the roots to the tips. Leave for 2-5 minutes and rinse thoroughly. Dry and style as normal!
STEP 4: CARING FOR YOUR COLOUR
To continue to care for and protect your hair, use Naturtint’s full range of aftercare and styling products, which have been specifically developed for coloured hair.
Reflex Semi-Permanent Henna Cream
If you are just going for a temporary colour change and only have a few grey hairs, read on to find out how to apply a Reflex Semi-Permanent Henna Cream and enhance your natural colour. Don’t forget your Skin Sensitivity and Colour Strand Tests first!
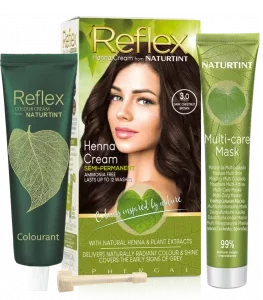
What’s in a box of Reflex Semi-Permanent Henna Cream?
Reflex Colourant Tube (60ml)
Applicator Nozzle
Quinoa Multi-Care Mask (50ml)
Plus:
Protective gloves – to be worn at all times during the colouring process
Instruction Leaflet – please read completely at least once before use, and follow carefully.
What else might you need?
An old towel or protective cape to cover your shoulders and prevent staining on your clothes – you may also want a hair grip to keep it in place. Some people also like to use a tail comb to part the hair or an application brush to apply. Don’t forget a watch or timer to keep an eye on your development time!
STEP 1: PREPARE YOUR COLOUR
Ensure your hair is clean before colouring, as a build-up of styling products can affect your colour result. Wash your hair with a natural pH shampoo such as the Naturtint Colour Fixing Shampoo and rinse well with water. Do not use a conditioner. Lightly dry your hair and comb through before application.
Always wear the gloves provided and ensure you have all the utensils you may need to hand.
1. Protect your shoulders with a towel to prevent accidental staining of your clothes. You may also wish to protect the immediate surrounding area, especially any carpets or fabric, as permanent staining may occur if any colourant is accidentally spilt.
2. Put on the gloves provided and keep them on during the whole colouring process.
3. Unscrew the cap of the Colourant Tube and replace with the Applicator Nozzle.
STEP 2: APPLY YOUR COLOUR
1. Using gloved hands, first apply the colourant to your roots, using the tip of the Applicator Nozzle to part your hair into small sections.
2. Immediately massage the remaining product through the rest of your hair, using gloved hands, to ensure the colourant is evenly spread.
3. Leave to develop for 30 minutes (or up to 45 minutes if you have stubborn grey).
STEP 3: RINSE, CLEANSE & CONDITION
1. RINSE: Once you have reached your desired development time, gently massage your hair whilst thoroughly rinsing it with warm water until the water runs completely clear.
2. CLEANSE: Wash your hair with a natural pH shampoo, such as the NATURTINT® Colour Fixing Shampoo to gently cleanse and moisturise your hair. Gently massage into a lather and then rinse thoroughly.
3. CONDITION: Gently squeeze excess moisture from your hair. Then apply a small amount of the NATURTINT® Quinoa Multi-Care Mask to your hair, working from the roots to the tips to ensure all of your hair is covered. Leave on the hair for 3-5 minutes, the rinse thoroughly with plenty of water. The Multi-Care Mask (C) contains 50 ml of product so you can repeat this step in subsequent washes to prolong the vibrancy and shine for longer.
4. Dry and style as normal.
TOP TIP! In between colourings, try to use Shampoo and Conditioners designed for coloured hair like the Naturtint Aftercare Range and always avoid anti-dandruff or strong shampoos as they will quickly remove the colour from your hair.
If you have any questions or queries about application or any aspect of colouring, please call our helpline on 0345 601 8129 or email [email protected], or visit our FAQs page.

Find your shade
Take a look at our palette of rich and vibrant shades to find the perfect colour for you

Customer Reviews
Find out what other Naturtint users think about our range and leave your own review